GANs for Watermark Removal
Generative Adversarial Networks, or GANs, are a new machine learning technique developed by Goodfellow et al. (2014). GANs are generally known as networks that generate new things like images, videos, text, music or nealry any other form of media. This is not the only application of GANs, however. GANs can be used for image reconstruction as well as you’ll see in this post where we’re building a watermark remover tool.
Crappifying
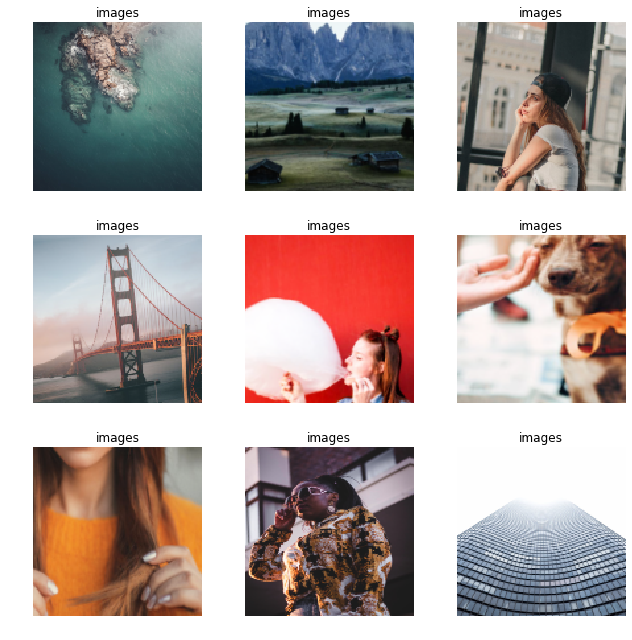
Generating a dataset for this type of network is trivial. The only thing needed is a set clean images, which you can get from sites such as pexels.com or unsplash.com.
I got my images off pexels. First, create a list of images by pasting this into the javascript console.
var images = document.getElementsByClassName('photo-item__img');
var links = [];
for(var i = 0; i < images.length; i++) {
	a.push(images[i].srcset);
}
window.open('data:text/csv;charset=utf-8,' + escape(a.join('\n')));
After that I used some sublime text magic (COMMAND+A, COMMAND+SHIFT+L) to turn this list into a python dictionary and pasted it into the proram. (images)
Downloading the images is easy:
for image in images:
    open('images/{}.jpg'.format(i), 'wb').write(requests.get(image).content)
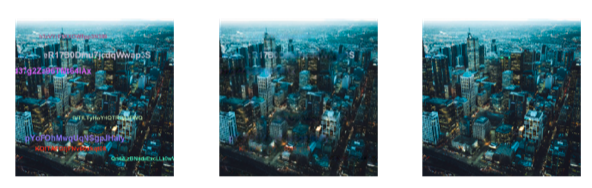
The following step is called “crappifying”. One makes a copy of the image that he transforms in the way that needs to be done in reverse by the model. Say you wanted to make a GAN that turns black/white images into colored images, you’d need to apply a black and white filter to the images.
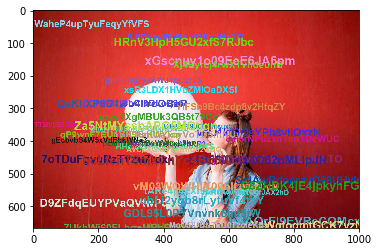
In this case, I wanted to remove watermarks from the images so I drew some text on the images. See the Pillow documentation if you’re not familiar with the framework.
for im in os.listdir('images'):
	img = Image.open('images/' + im).convert("RGB")
	width, height, _ = np.array(img).shape

	d = ImageDraw.Draw(img)
	for i in range(random.randint(5, 50)):
		fnt = ImageFont.truetype('font.ttf', size=np.random.randint(20, 40))
		fnt.size = np.random.randint(40, 125)
		d.text((random.random() * width, random.random() * height), ''.join([random.choice(string.digits + string.ascii_letters) for x in range(20)]), fill=(random.randint(0,255), random.randint(0,255), random.randint(0,255)), font=fnt)
	img.save('crappy/' + im)
This is what an image could look like:
Loading the data in fastai
Loading the data into fastai is done in the usual way:
def get_data(bs,size):
    data = (src.label_from_func(lambda x: Path('images')/x.name)
           .transform(get_transforms(max_zoom=2.), size=size, tfm_y=True)
           .databunch(bs=bs).normalize(imagenet_stats, do_y=True))

    data.c = 3
    return data

src = ImageImageList.from_folder(Path('mess')).split_by_rand_pct(0.1, seed=42)
data_gen = get_data(bs=8,size=128)
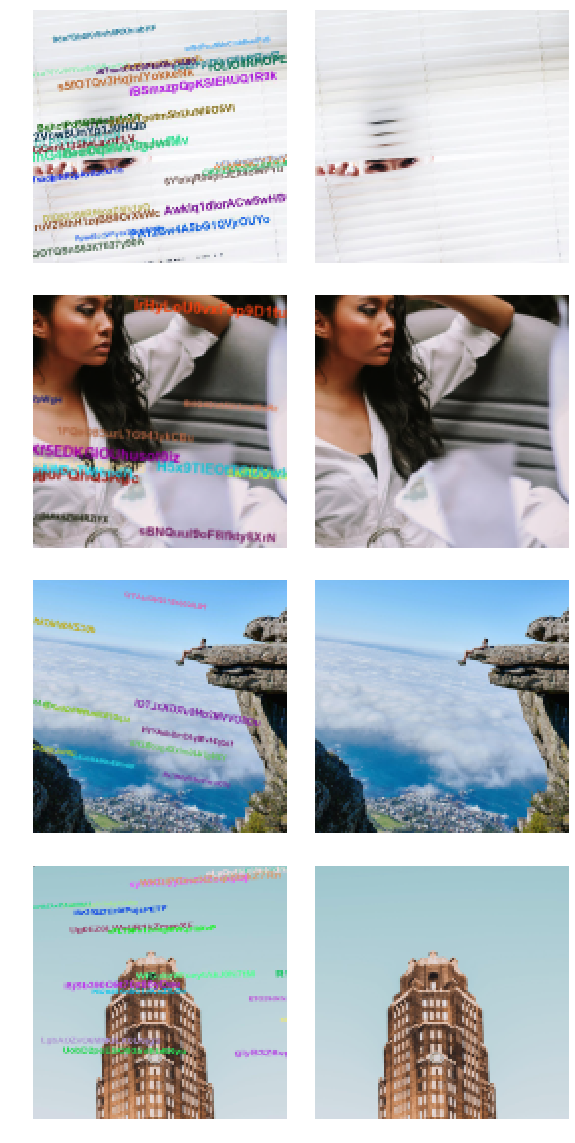
The crappy images next to the original images (data_gen.show_batch(4)):
Quick introduction to GANs
As mentioned in the introduction, GAN stands for Generative Adversarial Network. Let’s break that down. Generative is creating new things, the main application of GANs. Adversarial means involving opposition/conflicts. As you’ll learn in a minute, this is the way these networks learn. Network is, naturally, neural networks.
GANs consist of two neural networks trained simultaneously: the generator and the critic. You can approach GANs by seeing them as a virtual cat and mouse game. The generator is the model that generates any kind of media. The critic, or discriminator, is a binary classifier as we’ve seen before. It tries to distinguish between real images (from the training set) and images trained by the generator. As training progresses, the discriminator gets better at this task after which the generator learns to create more convincing images etc.
Let’s take images as an example. The generator can be trained using transfer learning so it starts with a basic understanding of what images look like. During training, however, it’s very important the discriminator penalizes generated images that do not look like images from the dataset. If this were not the case, the generator would create great images, but they wouldn’t fit in the desired category.
A simple generator
Before starting criticizing the images, it’s important to have a simple generator so it knows a little bit about the dataset before perfecting itself. If this the generator were not trained in advance, it would be virtually impossible for it to learn and it would take a very long time to train the GAN.
The configuration for the generator learner:
wd = 1e-3
y_range = (-3.,3.)
loss_gen = MSELossFlat()
As mentioned in the introduction, generators are usually trained using transfer learning to speed up the process.
def create_gen_learner(wd, data_gen, y_range, loss_gen):
    return unet_learner(data_gen, arch, wd=wd, blur=True, norm_type=NormType.Weight,
                         self_attention=True, y_range=y_range, loss_func=loss_gen)

arch = models.resnet34
learn_gen = create_gen_learner(wd, data_gen, y_range, loss_gen)
First train the head and then unfreeze train the whole network for a bit:
learn_gen.fit_one_cycle(2, pct_start=0.8)
learn_gen.unfreeze()
learn_gen.fit_one_cycle(3, slice(1e-6,1e-3))
learn_gen.show_results(rows=4)
After less than 5 minutes of training (on a n1-highmem-8 instance on Google Cloud Platform), we can see some pretty good results already (learn_gen.show_results(rows=4)).
This is far from a finished product, so let’s get to the fancy stuff: GANs.
Upgrade: the GAN
The critic
To create the critic, discriminator, we need to feed it data to judge by. To give the generator a slight advantage, the data is slightly transformed.
def get_crit_data(classes, bs, size):
    src = ImageList.from_folder(path, include=classes).split_by_rand_pct(0.1, seed=42)
    ll = src.label_from_folder(classes=classes)
    data = (ll.transform(get_transforms(max_zoom=2.), size=size)
           .databunch(bs=bs).normalize(imagenet_stats))
    data.c = 3
    return data

data_crit = get_crit_data(['crappy', 'images'], bs=16, size=128)
The critic’s dataset:
The loss function the critic will use is BCEWithLogitsLoss. This loss function is particularly well suited because it penalizes not only on how realistic images are, but also on how similar the image is to images in the dataset.
loss_critic = AdaptiveLoss(nn.BCEWithLogitsLoss())
Finally, create the critic:
def create_critic_learner(data, metrics):
    return Learner(data, gan_critic(), metrics=metrics, loss_func=loss_critic, wd=1e-3)

learn_critic = create_critic_learner(data_crit, accuracy_thresh_expand)
Switcher
Next, before creating the generator, we need to create a switcher which will control the “collaboration” between the critic and generator.
switcher = partial(AdaptiveGANSwitcher, critic_thresh=0.65)
Generator
Continuing the first generator, this is how you’d extent it to be a GAN generator.
learn = GANLearner.from_learners(learn_gen, learn_crit, weights_gen=(1.,50.), show_img=False, switcher=switcher,
                                 opt_func=partial(optim.Adam, betas=(0.,0.99)), wd=1e-3)
learn.callback_fns.append(partial(GANDiscriminativeLR, mult_lr=5.))
Training
Training a GAN is super easy in fastai thanks to the isolation of the components. GANs make progress slowly so we usually train for a large number of epochs.
lr = 1e-4
learn.fit(20, lr)
Looking at the results
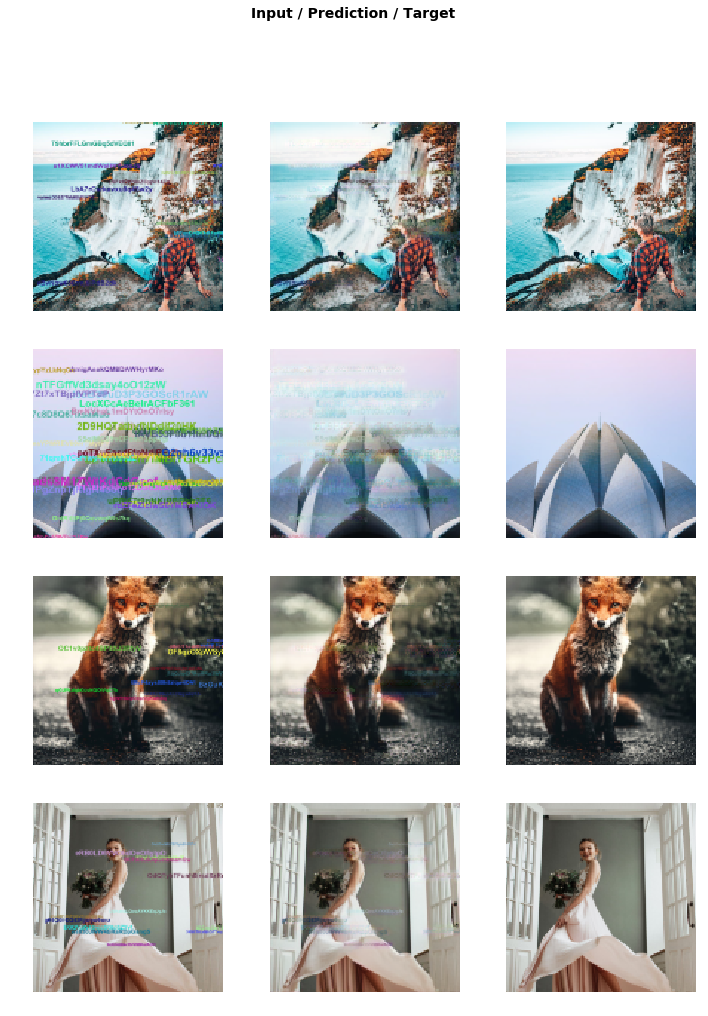
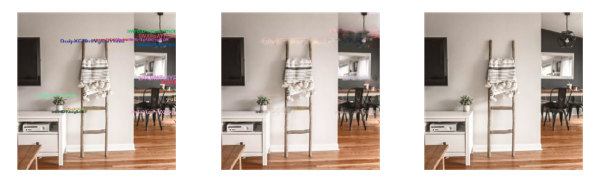
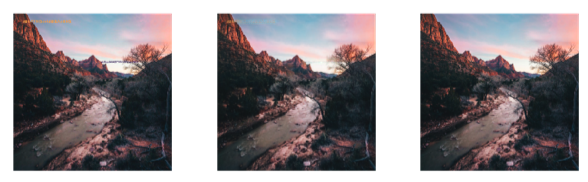
After only half an hour of training on only 1000 images (nothing compared to datasets owned by Google and Facebook), the model is working surprisingly well as you can see in the images below. The left image is the input, the middle image is the output and the right image is the training image.
Disclaimer
I got these images from pexels. Because I downloaded so many images, I couldn’t keep track of which images are in the post. If you recongize your image in this post, please tweet me (@rickwierenga) and I’ll add credit.
Where to go from here?
If you liked this tutorial, you should definitely read the original GAN paper. Arxiv.
You should also check out a similar project on GitHub: DeOldify.
A huge thanks to Sam Miserendino for proofreading this post!
Thanks for reading
I hope this post was useful to you. If you have any questions or comments, feel free to reach out on Twitter or email me directly at rick_wierenga [at] icloud [dot] com.