Your first Swift for TensorFlow model
Swift for TensorFlow is TensorFlow, implemented in Swift. Its Python counterpart (“TensorFlow”) is one of the best deep learning libraries ever made, but it’s hitting its limits. Python, being interpreted, is quite a slow language. Python is also limiting in many other ways, it lacks features that could make your life, as a programmer, much easier.
So the TensorFlow team started looking for a better alternative. They chose Swift: a new, open source programming language originally developed by Apple, with a great focus on speed and readability. So here we are, Swift for TensorFlow is in the making. Even though the library lacks many features at this point, it is useable already.
In this post I would like to show you how to build a perceptron and a convolutional neural network using this fancy new framework.
If you do not already know Swift, you will be surprised by the sheer amount of high quality learning resources available. The best place to start is the swift website. On the website, you will find a complete book to learn the language. The Swift for TensorFlow (S4TF) project is an extension of the Swift programming language with many additional features, beyond just deep learning. Here is its homepage.
Getting started with S4TF can be done without any setup using Google Colab. Swift is not currently registered as a default kernel, so you should use this empty notebook as a starting point when developing Swift for TensorFlow applications.
Downloading dependencies
Installing dependencies can be done right from your Notebook. You must specify a branch, and one or more targets specified in a library’s package.swift file. We target Datasets in this case.
%install-location $cwd/swift-install
%install '.package(url: "https://github.com/tensorflow/swift-models", .branch("tensorflow-0.6"))' Datasets
Now we can import TensorFlow and Datasets which we just fetched.
import TensorFlow
import Datasets
Since the Swift for deep learnign ecosystem, and the Swift ecosystem overall, is still very young there aren’t many stable libraries for some tasks like plotting. So sometimes we have to fall back on the well-established Python libraries. Luckily, Swift has excellent supoprt for Python interop.
You can import any Python library, by first importing the Python module in Swift and then importing a library. We will use matplotlib for plotting graphs and numpy to store data we are sending to matplotlib.
import Python
let plt = Python.import("matplotlib.pylab")
let np = Python.import("numpy")
To use matplotlib inline, run the following code: (make sure it’s ran in a separate cell)
%include "EnableIPythonDisplay.swift"
IPythonDisplay.shell.enable_matplotlib("inline")
import Datasets
Now we can initialize an MNIST instance. The API will automatically normalize each image. We will use a batch size of 512 here because it’s, in my experience, the fastest option we can use in Colab. Feel free to play around with it.
let batchSize = 512
let mnist = MNIST(batchSize: batchSize, flattening: false, normalizing: true)
Building a perceptron
We will first look at the simplest neural network: a one layer perceptron.
Dense layers
Swift requires you to tell it what data type you want each layer’s corresponding tensors’ elements to be. Here we use Float. The input and output size are identical to almost every other deep learning library. The activation function is available as a closure, we cas pass onto the layer. Because a layer expects a closure for the activation argument, it’s very easy to develop your activation functions.
Dense<Float>(inputSize: 28 * 28, outputSize: 300, activation: relu)
Flatten layers are very similar:
Float<Float>()
Building a simple model
This is how you would define a model in Swift:
struct Model: Layer {
    var flatten = Flatten<Float>()
    var hiddenLayer = Dense<Float>(inputSize: 28 * 28, outputSize: 300, activation: relu)
    var outputLayer = Dense<Float>(inputSize: 300, outputSize: 10, activation: softmax)

    @differentiable
    func callAsFunction(_ input: Tensor<Float>) -> Tensor<Float> {
        return input.sequenced(through: flatten, hiddenLayer, outputLayer)
    }
}
The callAsFunction function will be called when we feed forward input through the neural network.
Now create an instance of Model:
var model = Model()
This needs to be a variable because it will be changed througout training.
Training the network
First specify the number of epochs.
let epochs = 10
Next we need an optimizer. Optimizers are, like many things in S4TF, also structs. So we need to initialize one:
let optimizer = Adam(for: model)
Now we are ready to implement a training loop:
for epoch in 1...10 {
  ...
}
In this loop we want to do two things:
- Update the parameters
- Evaluate the model and print out the results
1. Updating the parameters
When you are training a model in TensorFlow you should tell it. TensorFlow will automatically adapt to your current learning phase. For example, dropout will be applied during learning, but not during inference.
Context.local.learningPhase = .training
In Swift we have to manage batching ourselves. This grabs the ith batch of size 512.
mnist.trainingImages.minibatch(at: i, batchSize: thisBatchSize)
However, because we use a batch size of \(512\) and \(60000 \text{mod} 512 = 96\), we would be left with 96 images if we always used 512 images each batch. That’s why we have to calculate a per-batch-batch-size. It’s always 512 (batchSize), except when i, the iterator, is too large. Then we use all remaining images.
let thisBatchSize = i * batchSize >= mnist.trainingSize ? (mnist.trainingSize - ((i - 1) * batchSize)) : batchSize
Now we are ready to perform an update step.
for i  in 0..<(mnist.trainingSize / batchSize)+1  {
    let thisBatchSize = i * batchSize >= mnist.trainingSize ? (mnist.trainingSize - ((i - 1) * batchSize)) : batchSize
    let images = mnist.trainingImages.minibatch(at: i, batchSize: thisBatchSize)
    let labels = mnist.trainingLabels.minibatch(at: i, batchSize: thisBatchSize)
    let (_, gradients) = valueWithGradient(at: model) { model -> Tensor<Float> in
        let logits = model(images)
        return softmaxCrossEntropy(logits: logits, labels: labels)
    }
    optimizer.update(&model, along: gradients)
}
That’s it. Our model will learn now.
2. Evaluating the model
Sitting there and waiting for a model to finish training is boring. Sitting there and looking at the accuracy improving over time is fascinating though, so let’s make that happen.
Because we want to inspect the model’s training history after training, we declare two empty numpy arrays. Using numpy is the best option, because this data will only be used by matplotlib, another Python library.
var trainHistory = np.zeros(epochs)
var valHistory = np.zeros(epochs)
We first set the learning phase to inference. Then we loop over the training set and test set and accumulate the correct predictions. We also store the accuracy in the numpy arrays for later use. Since the accuracy is in Swift’s Float type, but the numpy array expects PythonObjects, we have to convert the data. Finally, we print out the results.
Context.local.learningPhase = .inference

var correctTrainGuessCount = 0
var totalTrainGuessCount = 0
for i  in 0..<(mnist.trainingSize / batchSize)+1  {
    let thisBatchSize = i * batchSize >= mnist.trainingSize ? (mnist.trainingSize - ((i - 1) * batchSize)) : batchSize
    let images = mnist.trainingImages.minibatch(at: i, batchSize: thisBatchSize)
    let labels = mnist.trainingLabels.minibatch(at: i, batchSize: thisBatchSize)
    let logits = model(images)
    let correctPredictions = logits.argmax(squeezingAxis: 1) .== labels
    correctTrainGuessCount += Int(Tensor<Int32>(correctPredictions).sum().scalarized())
    totalTrainGuessCount += thisBatchSize
}
let trainAcc = Float(correctTrainGuessCount) / Float(totalTrainGuessCount)
trainHistory[epoch] = PythonObject(trainAcc)

var correctValGuessCount = 0
var totalValGuessCount = 0
for i  in 0..<(mnist.testSize / batchSize)+1  {
    let thisBatchSize = i * batchSize >= mnist.testSize ? (mnist.testSize - ((i - 1) * batchSize)) : batchSize
    let images = mnist.testImages.minibatch(at: i, batchSize: thisBatchSize)
    let labels = mnist.testLabels.minibatch(at: i, batchSize: thisBatchSize)
    let logits = model(images)
    let correctPredictions = logits.argmax(squeezingAxis: 1) .== labels
    correctValGuessCount += Int(Tensor<Int32>(correctPredictions).sum().scalarized())
    totalValGuessCount += thisBatchSize
}
let valAcc = Float(correctValGuessCount) / Float(totalValGuessCount)
valHistory[epoch] = PythonObject(valAcc)

print("\(epoch) | Training accuracy: \(trainAcc) | Validation accuracy: \(valAcc)")
You can now run the training loop and see the model learn!
Building a ConvNet
While perceptrons get a great accuracy on MNIST, we can do better using a convolutional neural network. Let’s have a look at how to build one using Swift for TensorFlow.
Convolutional Layers
The primary building block of convolutional neural networks are, well, convolutional layers. S4TF mirrors the TensorFlow API instead of the Keras API, so the syntax might seem odd to you at first. In Swift you pass the filter size, input dimensions, and number of filtesr all in one tuple. Padding is an enum, beautiful! Finally, you can just use relu as we’ve seen before. This convolutional layer has a filter size of 2 by 2, 1 input dimension (since MNIST is greyscale), and 32 filters.
Conv2D<Float>(
    filterShape: (2, 2, 1, 32),
    padding: .same,
    activation: relu
)
MaxPooling and Dropout
MaxPooling and Dropout layers have very similar APIs to their Keras counterparts.
This is how you would define a MaxPooling layer with a \(2\times2\) pool size and a slide of \(1 \times 1\):
MaxPool2D<Float>(poolSize: (2, 2), strides: (1, 1))
In Swift you cannot omit the keywoard probability when defining Dropout layers. This ensures consitent code througout the notebook.
Dropout<Float>(probability: 0.25)
Building the ConvNet
Let’s see how to combine these layers into a fully functional ConvNet. We start with two convolutional layers. Take a look at their input dimensions. Then we use a MaxPooling layer to compress the output of the convolutions. After this block we use a dropout layer with a 25% probability of dropping out, to prevent overfitting.
Before we code the head of the network, we need to flatten the output so that it can be passed onto a dense layer. Then we define two dense layers, with 128 and 10 output nodes respectively. In between those, we use another dropout layer, this time with a 50% probability of dropping out.
struct Model: Layer {
    var flatten1 = Flatten<Float>()
    var conv1 = Conv2D<Float>(
      filterShape: (2, 2, 1, 32),
      padding: .same,
      activation: relu
    )
    var conv2 = Conv2D<Float>(
      filterShape: (3, 3, 32, 64),
      padding: .same,
      activation: relu
    )
    var maxPooling = MaxPool2D<Float>(poolSize: (2, 2), strides: (1, 1))
    var dropout1 = Dropout<Float>(probability: 0.25)

    var flatten2 = Flatten<Float>()
    var dense1 = Dense<Float>(inputSize: 27 * 27 * 64, outputSize: 128, activation: relu)
    var dropout2 = Dropout<Float>(probability: 0.5)
    var dense2 = Dense<Float>(inputSize: 128, outputSize: 10, activation: softmax)

    @differentiable
    func callAsFunction(_ input: Tensor<Float>) -> Tensor<Float> {
        return input
          .sequenced(through: conv1, conv2, maxPooling, dropout1)
          .sequenced(through: flatten2, dense1, dropout2, dense2)
    }
}
You can use the same traning loop we used before.
Inspecting the results
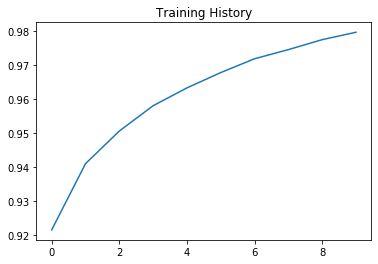
Plotting the data is surprisingly easy since we did most of the work already.
plt.plot(trainHistory)
plt.title("Training History")
plt.show()
It’s just like Python isn’t it?
Conclusion
As you’ve seen it’s not too hard to build and train a neural network in Swift, but it’s definitely harder than Python. In this case, that is. Swift has many more things to offer, and I’m sure we will see some great improvements over the next few months.
You can find the code here:
Be sure to star the GitHub repo where I will add many more Notebooks in the future!
Thanks for reading
I hope this post was useful to you. If you have any questions or comments, feel free to reach out on Twitter or email me directly at rick_wierenga [at] icloud [dot] com.